Acrylic nails are a type of artificial nail application popular for creating long, strong, and decorated nails. The best way to decide if acrylics are right for you is to consult with a professional nail technician. They can assess your natural nails, discuss your lifestyle and preferences, and recommend the best option for you. Here’s everything you need to know about Acrylic nails.
ALSO READ: 30+ Foschini Dresses To Buy In South Africa
What Are Acrylic Nails?
Acrylic nails are artificial extensions applied to enhance the appearance and strength of natural nails. Composed of a liquid monomer and a powder polymer, acrylic nails are formed into a malleable substance that can be shaped onto the natural nail bed or used to extend the nail length with tips. Once applied, acrylic nails harden into a durable and resilient layer that can withstand daily wear and tear. They offer versatility in terms of length, shape, and color, allowing individuals to achieve their desired nail aesthetics. From classic French tips to elaborate nail art designs, acrylic nails provide a canvas for creativity and expression. However, regular maintenance is required to upkeep their appearance and ensure the health of the natural nails underneath. Despite the need for maintenance, acrylic nails remain a popular choice for those seeking long-lasting and customizable nail enhancements.
Who Should Get Acrylic Nails?
Acrylic nails are a great option for many people, but there are some factors to consider to see if they’re the right fit for you. Here’s a breakdown of who might benefit from acrylics:
Good candidates for acrylic nails:
- People who struggle to grow their natural nails: If your nails are weak, brittle, or prone to breaking, acrylics can provide the strength and length you desire.
- Those who want dramatic nail art: Acrylics offer a wider canvas for creative designs and intricate details compared to natural nails.
- Individuals seeking long-lasting manicures: With proper care, acrylics can last up to six weeks without chipping or breaking.
- People who bite their nails: Acrylics can act as a physical barrier and discourage nail biting habits.
People who might want to reconsider acrylics:
- Those with allergies or sensitive skin: Some people may be allergic to the chemicals used in acrylics, causing irritation or discomfort.
- Individuals who are very active with their hands: If your job or hobbies involve a lot of handwork or contact with harsh chemicals, acrylics might be prone to damage.
- People who don’t like nail maintenance: Acrylics require regular fills every few weeks to maintain their appearance.
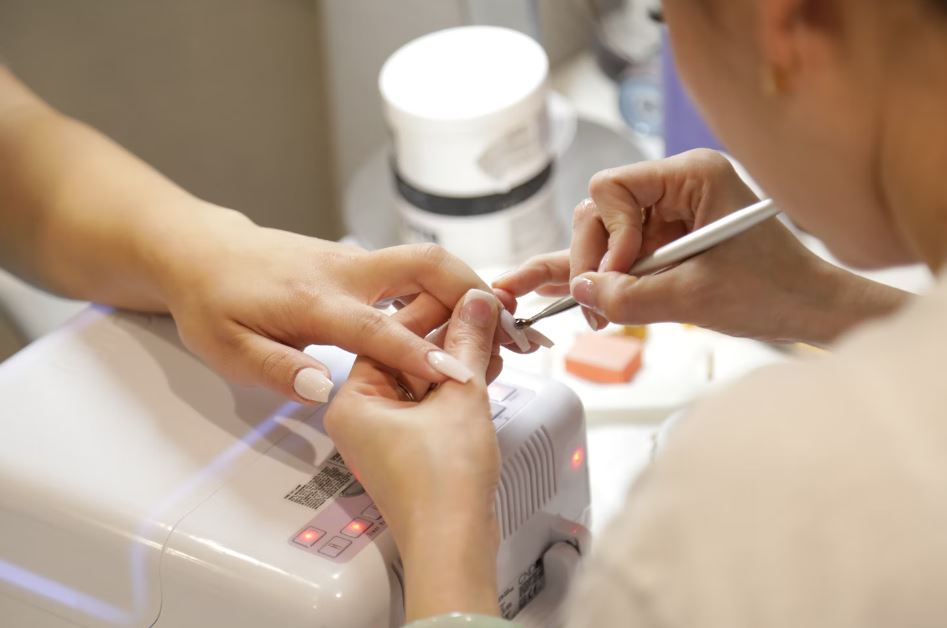
What Is The Process Of Applying Acrylic Nails?
The process of applying acrylic nails involves several steps and requires skill and precision to achieve a professional-looking result. Here’s an overview of the typical process:
- Preparation: The natural nails are cleaned and trimmed to the desired length. The nail technician may also push back the cuticles and gently buff the surface of the nails to create a smooth base.
- Nail Tip Application (optional): If the client desires longer nails, pre-made nail tips are applied to the natural nails using adhesive. The tips are trimmed and shaped to the desired length and style.
- Priming: A primer is applied to the natural nails to promote adhesion between the acrylic and the nail plate. This helps the acrylic nails adhere better and reduces the risk of lifting.
- Acrylic Application: The acrylic liquid (monomer) and acrylic powder (polymer) are mixed together on a small dish or palette. Using a small brush, the nail technician dips the brush into the liquid and then into the powder, creating a small bead of acrylic. This bead is applied to the natural nail or nail tip and shaped using the brush. Multiple layers may be applied to achieve the desired thickness and shape.
- Shaping and Filing: Once the acrylic has dried and hardened, the nails are shaped and refined using a nail file and buffer. This step helps to create smooth edges, even out any imperfections, and achieve the desired nail shape.
- Finishing Touches: After shaping, the nails are buffed to smooth out the surface and remove any roughness. The nails are then cleaned to remove any dust or debris.
- Polishing or Nail Art (optional): The acrylic nails can be polished with regular nail polish or adorned with nail art designs, glitter, or decals according to the client’s preference.
- Final Sealant: A top coat or sealant is applied to the nails to protect the acrylic and enhance the shine and durability of the manicure.
- Curing: If the acrylic used requires curing under a UV or LED lamp, the nails are placed under the lamp for a specific amount of time to harden and set the acrylic.
- Moisturizing: Finally, the hands and nails are moisturized with cuticle oil or hand lotion to hydrate the skin and nourish the nails.
Overall, the process of applying acrylic nails requires attention to detail and careful execution to achieve beautiful and long-lasting results.
How to Do Your Own Acrylic Nails At Home
While applying acrylic nails at home can be tempting for beautiful, long-lasting nails, it’s a process that requires specific products, practice, and proper technique. Here’s a breakdown to consider before you dive in:
What You’ll Need:
- Acrylic liquid (monomer): This has a strong odor and requires good ventilation.
- Acrylic powder (polymer): Comes in various colors for different nail effects.
- Acrylic brush: A specific type designed for handling the acrylic mixture.
- Nail tips (optional): Can be glued on to extend the nail bed before applying acrylic.
- Nail primer and dehydrator: Prepare the natural nail for better adhesion.
- Nail file and buffer: To shape and smooth the acrylic after application.
- Acrylic top coat: Provides a final layer of protection and shine.
- Cuticle oil: To keep cuticles healthy after application.
The Process (Generally):
- Prep your nails: This involves pushing back cuticles, trimming nails, and buffing the surface gently.
- Apply primer and dehydrator: Ensures the acrylic adheres properly. (Optional: Apply and shape nail tips)
- Mix the acrylic liquid and powder: Creates a workable bead for application.
- Sculpt the acrylic on the nail: Requires practiced technique to achieve desired shape and thickness.
- File and smooth the acrylic: Shapes the final look and removes imperfections.
- Apply top coat: Protects the acrylic and adds shine.
Things to Consider Before Doing Acrylics at Home:
- Learning curve: Applying acrylics takes practice and finesse to achieve a smooth, professional finish.
- Potential damage: Improper application or removal can damage your natural nails.
- Strong fumes: Acrylic liquid has a strong odor that requires proper ventilation to avoid irritation.
- Safety precautions: Acrylic liquid is flammable and should be handled with care.
Alternatives to Consider:
- Gel nails: Can be applied at home with a UV or LED lamp and require less filing compared to acrylics.
- Press-on nails: High-quality press-on nails offer a temporary yet beautiful option with easy application and removal.
Watch The Below Acrylic Nail Tutorial Video
Acrylic Nails FAQs
Here are some frequently asked questions (FAQs) about acrylic nails and their application process:
How long do acrylic nails last?
Acrylic nails typically last for about 2-3 weeks before needing a fill or infill. However, this can vary depending on factors such as the individual’s nail growth rate and how well they maintain the nails.
Can acrylic nails damage natural nails?
Improper application or removal of acrylic nails can potentially damage the natural nails. It’s essential to seek professional services and follow proper nail care practices to minimize the risk of damage.
How are acrylic nails removed?
Acrylic nails can be removed by soaking them in acetone to dissolve the acrylic. Alternatively, they can be filed down until they are thin enough to gently pry off. It’s recommended to have acrylic nails removed by a professional nail technician to avoid damage to the natural nails.
Are acrylic nails safe during pregnancy?
While acrylic nails are generally considered safe during pregnancy, some individuals may prefer to avoid them due to concerns about exposure to chemicals such as acrylic monomer and acetone. It’s advisable to consult with a healthcare provider for personalized advice.
Can I apply acrylic nails at home?
While it’s possible to apply acrylic nails at home using DIY kits, it’s recommended to seek professional services from a licensed nail technician for the best results. Professional nail technicians have the expertise and tools to ensure proper application and minimize the risk of damage to the natural nails.
How much does it cost to get acrylic nails done?
The cost of getting acrylic nails done can vary depending on factors such as the salon’s location, the technician’s expertise, and any additional services or nail art requested. On average, a full set of acrylic nails can range from R300 to R500 or more.
Can I get acrylic nails if I have allergies?
Individuals with allergies or sensitivities to acrylic monomer or other nail products should consult with a dermatologist or allergist before getting acrylic nails. They may recommend alternative nail enhancement options or advise on precautions to minimize the risk of allergic reactions.
How should I care for acrylic nails?
Proper care for acrylic nails includes avoiding activities that may cause damage or lifting, such as excessive exposure to water or harsh chemicals. Regular maintenance, such as fills or infills every 2-3 weeks, and moisturizing the nails and cuticles, can help prolong the lifespan of acrylic nails and maintain their appearance.
Conclusion
In conclusion, while acrylic nails offer stunning and durable results, achieving them at home requires dedication and practice. For beginners, it might be smarter to explore options like press-on nails or gel polish. However, if you’re determined to master the art of acrylic application, there are plenty of online resources and tutorials (like the one linked above) to guide you. Remember, consulting a professional for the initial application can be a valuable learning experience!
Image Courtesy: Unsplash