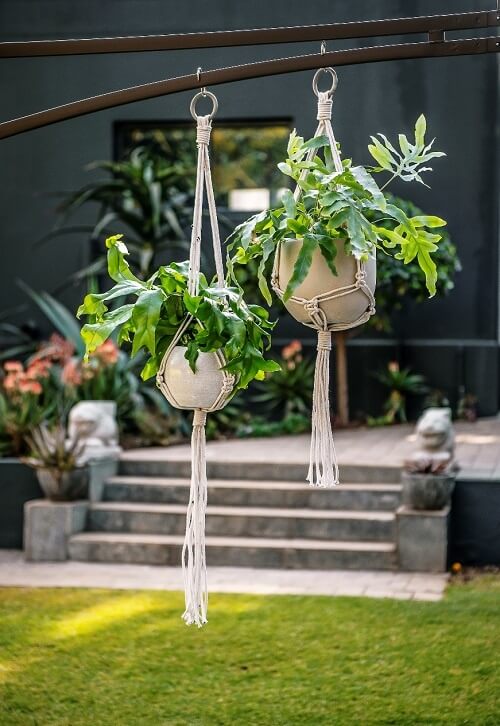
Learning the skill of Macrame puts you at a DIY advantage, it’s not only cost effective it’s also very easy. For many, the art of Macrame is an outlet and provides a creative way to get distracted from day-to-day stress and/or anxiety. This knotting technique dates to the early 1900’s and enhances any visual instantly by providing a fun bohemian finish to any living space. What is more, Macrame is a skill that anyone can learn to create a functional or a visually appealing item.
ALSO READ: Builders: DIY create a feature wall without breaking a bank
Leaders in home improvement and DIY, Builders, have created some great DIY tips through their fun and interactive blog. Below are some tips and tricks to help you enhance your living space by creating your own Macrame pieces.
Here is what you will need:
- 3 large balls of T-shirt yarn
- wooden dowel or another curtain rod of your choice
- sharp scissors
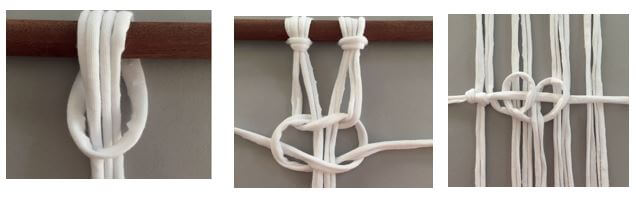
1.) How to tie a lark’s head knot – Fold a length of T-shirt yarn in half and fold the loop around the dowel. Insert the yarn ends through the loop and pull tight to form a knot.
2.) How to tie the square knot – Place cord 1 over cords 2 and 3 (the knot carriers). Place cord 4 over the end of cord 1, under cords 3 and 2 and insert through the loop and over cord 1. Place 1 over 3 and 2. Place 4 over end of 1. Insert 4 under 1, 2 and 3, through the loop and out over 1. Pull tight to form a knot.
3.) How to tie the double half hitch – Pass the cord from the back to the front over the knot carrier (the cord that was brought in) and again from the front to the back. Bring the end out through the two knots.
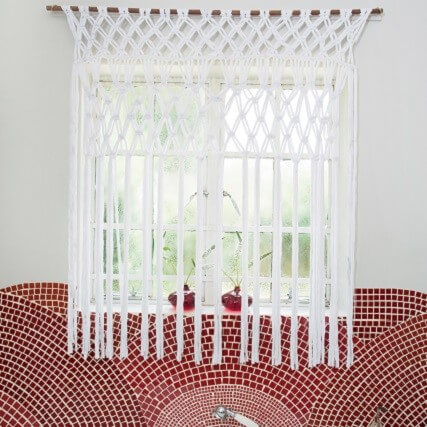
Step by step guide on how to make it:
Step 1 – 3: Prepare your yarn
- 1. Multiply the height of your window by 5 and cut 32 lengths of T-shirt yarn according to this measurement.
- 2. Let the dowel ends rest on two tables or chairs so you can work with ease with the cords hanging down.
- 3. Find the center of each length of yarn and knot a lark’s head knot.
Step 4 – 6: Tug Master…
- 4. Row 1: Take the first four cords and make a square knot directly under the dowel.
- 5. Row 2: Leave the first two cords, take the next four cords and make a square knot 4cm below the previous row.
- 6. Take the next four cords and make a square knot. Continue in this way to the end of the row so two cords remain.
Step 7 – 9: Align the rows, you’re almost there…
- 7. Row 3: Take the first four cords and make a square knot 4cm below the knots in the previous row. Take the next four cords and make a square knot. Continue in this way to the end of the row. The square knots now form an alternating pattern.
- 8. Row 4: Repeat the steps from row 2.
- 9. Row 5: Bring in an extra length of yarn from the left-hand side and make double half hitch knots with each cord 2cm below the previous row of knots.
note: The cord that was brought in is left out in all the rows.
Step 10 – 15: Final stage, it’s looking good!
- 10. Row 6: Take the next four cords and make a square knot 8cm below the knots in the previous row. Complete the row in the same way. Leave the last cord.
- 11. Row 7: Leave the first two cords and take the four middle cords between each square knot and again make a square knot directly below the two previous square knots. Repeat to the end of the row.
- 12. Row 8: Now make square knots using the four loose cords between the square knots made in the previous row 8cm further down.
- 13. Row 9: As row 3, but 8cm further down.
- 14. Row 10: As row 2, 8cm further down.
- 15. Row 11: As row 9. Hang the curtain and leave the cords hanging down. Trim the cords to the desired length. More cords and single knots can be added to both sides of the curtain, if necessary.
For more DIY inspiration and tips visit the Builders website, for all the products as well as the Builders blog for more Macrame inspiration and DIY tips and tricks.
Image Courtesy: Supplied